Exploring Your SEOIE Account

Managing SEO and analytics shouldn’t feel like piecing together a puzzle.

Whether you are looking to track your latest content performance or automate your reporting, the SEOIE App is built to bridge the gap between your raw Google data and actionable insights.

In this post, we’ll walk you through the five key features of the SEOIE App to briefly explain what each one does.

Then, we will proceed to a step-by-step guide in this same post to take you from your first login to a fully generated, comprehensive Looker report.

Table of Contents

1. Navigate SEOIE

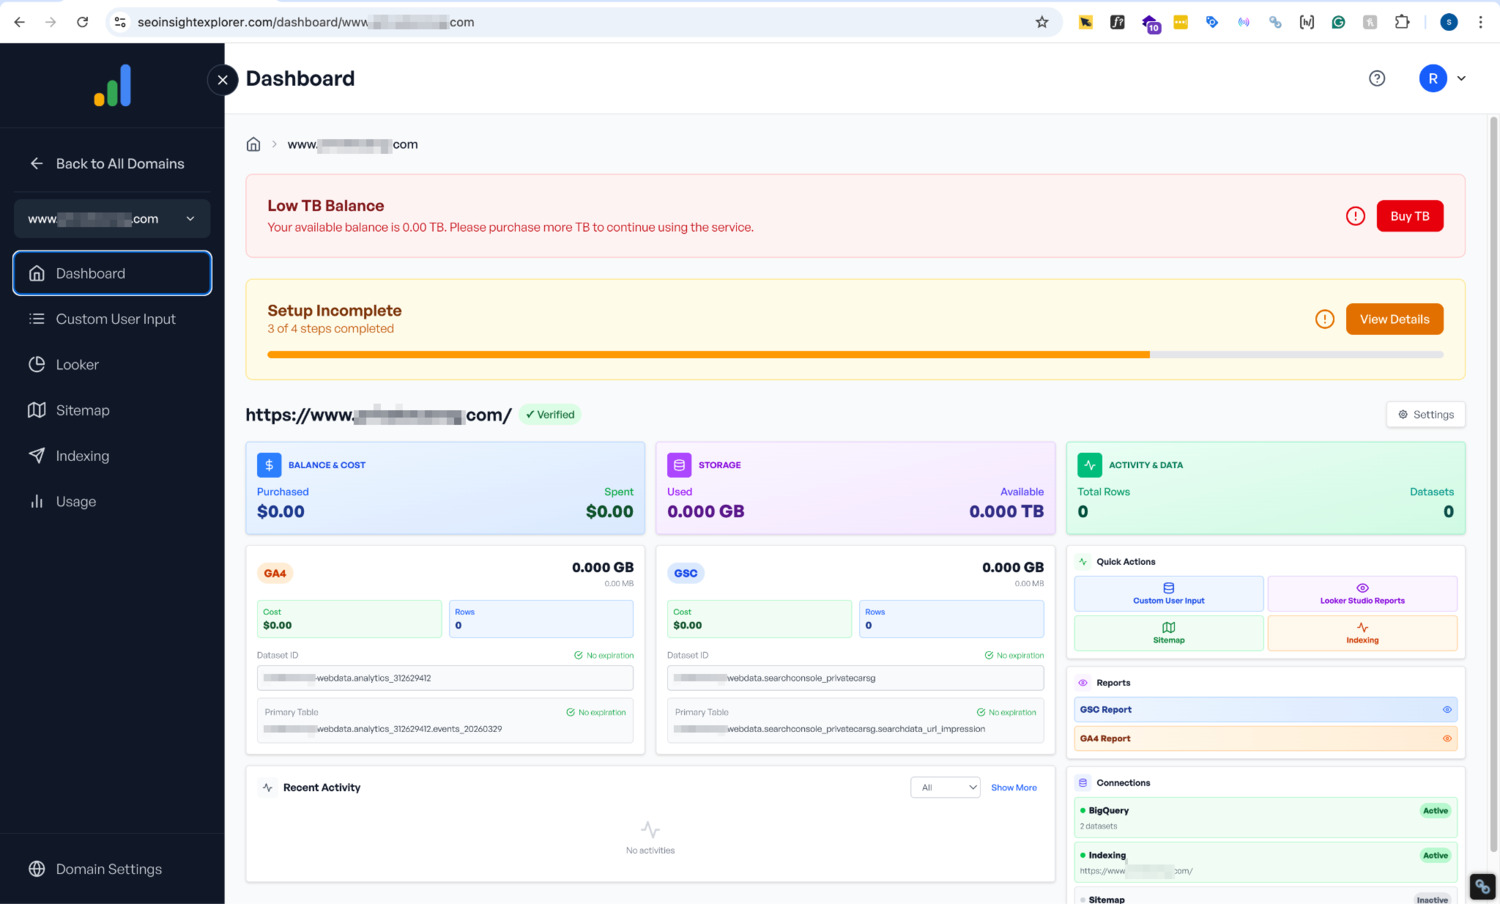
First up is the Dashboard – which is not a key feature in itself, but the starting point of your SEOIE journey.

Here is a brief explanation of the 5 Key Features in the SEOIE App:

  • Custom User Input

Manually key in specific data entries to gain deeper insights into your content performance. By adding entries for Question, Brand, Topic, and Key Event, you provide the necessary context to move beyond raw metrics and truly understand how your content is performing.

  • Looker

Instantly generate Looker reports. This feature bridges the gap between Google Analytics 4 (GA4) and Google Search Console (GSC), giving you a unified dashboard for all your search and engagement data.

  • Sitemap

Crawl your entire website, including pages that are not yet indexed. Here, you can assign Segment Groups and Intent Groups to every URL to see which content groupings are performing for your SEO content strategy.

  • Indexing

Monitor your website’s visibility. Easily check the indexing status of your URLs by following our integrated setup guide to ensure Google is seeing your most important pages.

  • Usage

Keep track of your technical infrastructure. Monitor your daily BigQuery storage levels and daily data transfer per website to manage your resources efficiently.

2. How To Add Your First Project

Here is your SEOIE Setup Checklist:

Step 1: Connect GA4 & GSC to Google Cloud Platform (GCP)

First, you need to connect Google Analytics 4 (GA4) and Google Search Console (GSC) to the Google Cloud Platform (GCP). For specific instructions, refer to this guide: How To Connect GA4 & GSC to Google Cloud Platform (GCP).

Important: After connecting your GSC and GA4 to BigQuery, It typically takes up to 48 hours for the initial data tables to populate in BigQuery.  You can only proceed to Step 2 until you see these tables in your GCP console.

Step 2: Sign In to SEOIE

Sign in to the SEOIE App. As a best practice, use the same email address you used for your Google Cloud Platform account to ensure your data permissions sync correctly. 

For more details, refer to: How To Sign In SEOIE For First Time Users.

Step 3: Connect GSC to SEOIE & Add Sitemap

Once signed in, complete the setup by connecting your Google Search Console (GSC) property to the SEOIE App and fetch XML sitemap. This allows the app to crawl your URLs correctly.

Refer to this link for detailed steps: How To Connect GSC & Add Sitemap In SEOIE.

Step 4 & Step 5 are where the “deep insights” happen by telling the app how to read your data.

Step 4: Add Segment & Intent Content Grouping in SEOIE

Next, proceed to add segment grouping and intent grouping to your SEOIE setup. For more details, refer to: How To Add Segment & Intent Content Grouping In SEOIE.

Step 5: Add Data Entries in Custom User Input

In this section, you need to add data entries for the categories below to unlock in-depth content performance insights in your Looker report:

  • Questions
  • Brand
  • Topic
  • KeyEvent

For a step-by-step guide on adding these entries, refer to: How To Set Questions, Brand, Topic & KeyEvent.

Step 6: Generate GSC & GA4 Looker Reports

After completing Steps 1 through 5, you can generate your integrated GSC & GA4 Looker reports. Follow the details in the links below:

Step 7: Add Additional Domain to SEOIE App (Optional)

If you want to add additional domain to the SEOIE App, follow the instructions provided here: How To Add On Domain To SEOIE App Step By Step.

Request Access