Step 1: Create Dataset Under Your Project
First, you need to go here: https://console.cloud.google.com/bigquery to select the correct project and then create a dataset.

In my example, I create a new dataset under seoie-webdata project.

A window will pop up as shown in the image below:

Key in the details below:
- Enter your Dataset ID (for example: gsheet_data1);
- Enter your Data location (for example: US (multiple regios in United States)
And then click Create dataset. Dataset with name gsheet_data1 created.
Step 2: Add Google Sheet User Input In Big Query
Under the dropdown list of your project (seoie-webdata), go for dataset (gsheet_data1), click the “triple dot” beside the dataset name, then click on “Create table”.

A window will pop up as shown in the image below:

Key in the details below to link the google sheet into Big Query:
- Create table from: choose Drive
- Select Drive URL: paste the URL of your Google Sheet. (Follow this guide: How To Prepare Your Google Sheet For BigQuery Integration)
Note: Make sure Google Sheet is saved in the same account as your Google Cloud, they must use the exact same email address.
- File format: Google Sheet
- Project: *your project name* (for example: seoie-webdata)
- Dataset: *your dataset name* (for example: gsheet_data1)
- Table: *input a table name* (for example GSC_GA4_Sitemap_New)

Under the Schema, do not click “Auto-detect”, however, click on “Add on Field”.
Copy the column name from the Google sheet and paste it into the “Filed Name”. Subsequently, continue the same method for the following fields.
Note: Kindly maintain the “type” and “mode” of the filed
Under Advanced options, Header rows to skip: 1

Click “Create Table” once all the details are confirmed. Your new table should appear in the dataset that you selected.
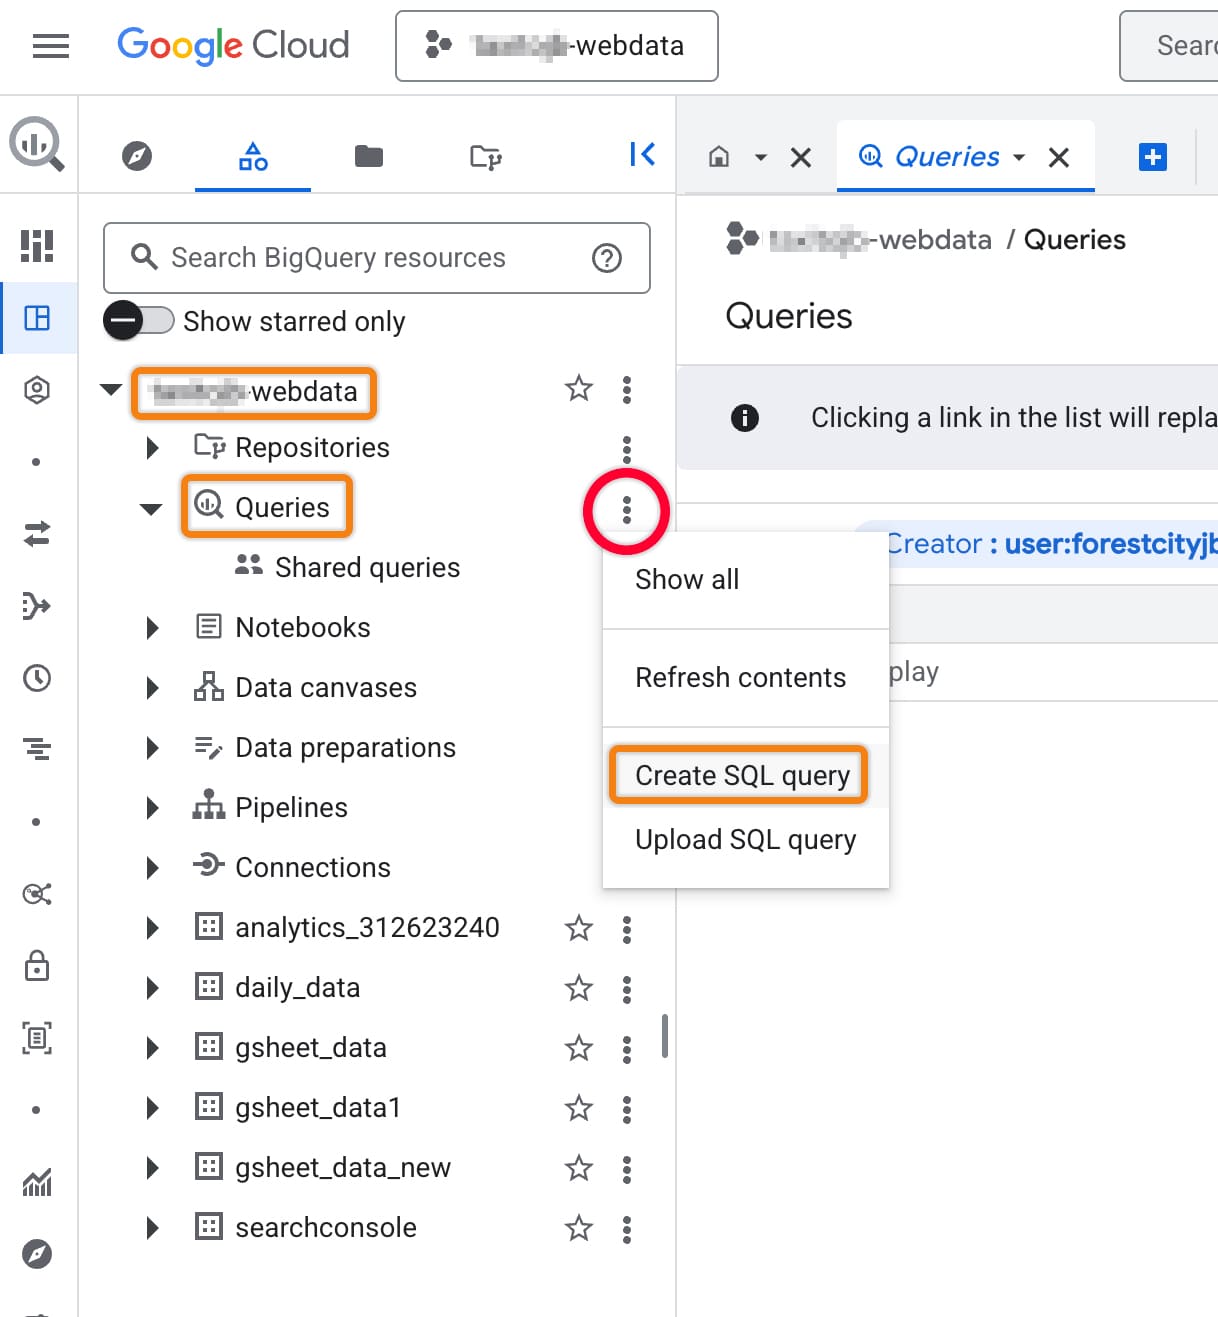
Under the dropdown list of your project (seoie-webdata), go for Queries, click the “triple dot” beside the Queries, then click on “Create SQL query”.
Request SQL Logic.sql file by clicking here and open either via text editor or Visual Studio Code and copy the scripts and paste to SQL query as shown below.

After that, click “Save”.
A window will pop up and key in the details as below:
- Name: *input your query name* (for example: Gsc_GA4_Merge)
- Region: *select your region* (for example us-centrall1 (lowa)

Click “Save” once all the details are confirmed.
Next, get the three table id as shown in image below.
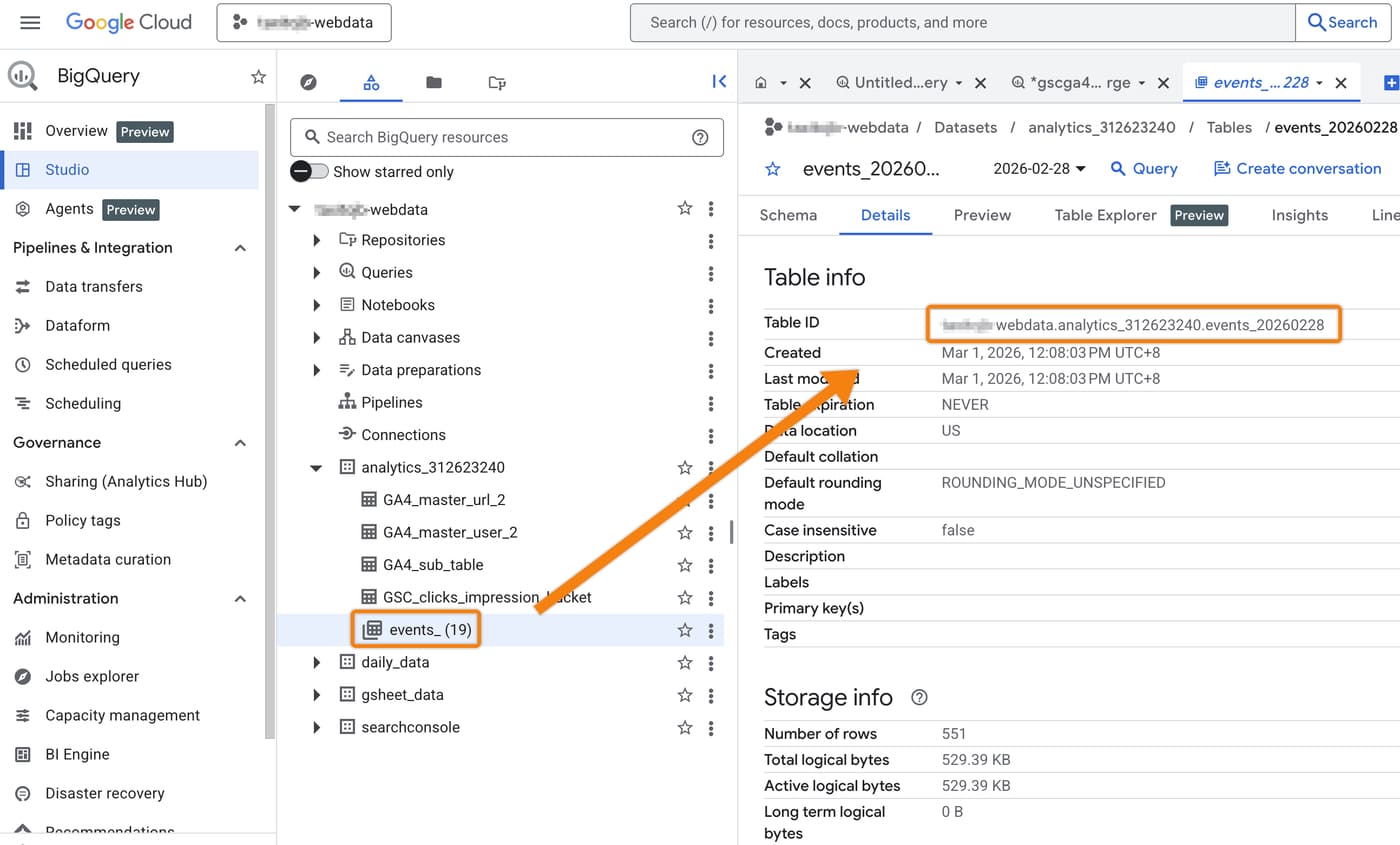
GA4 events table id

GSC searchdata_url_impression table id
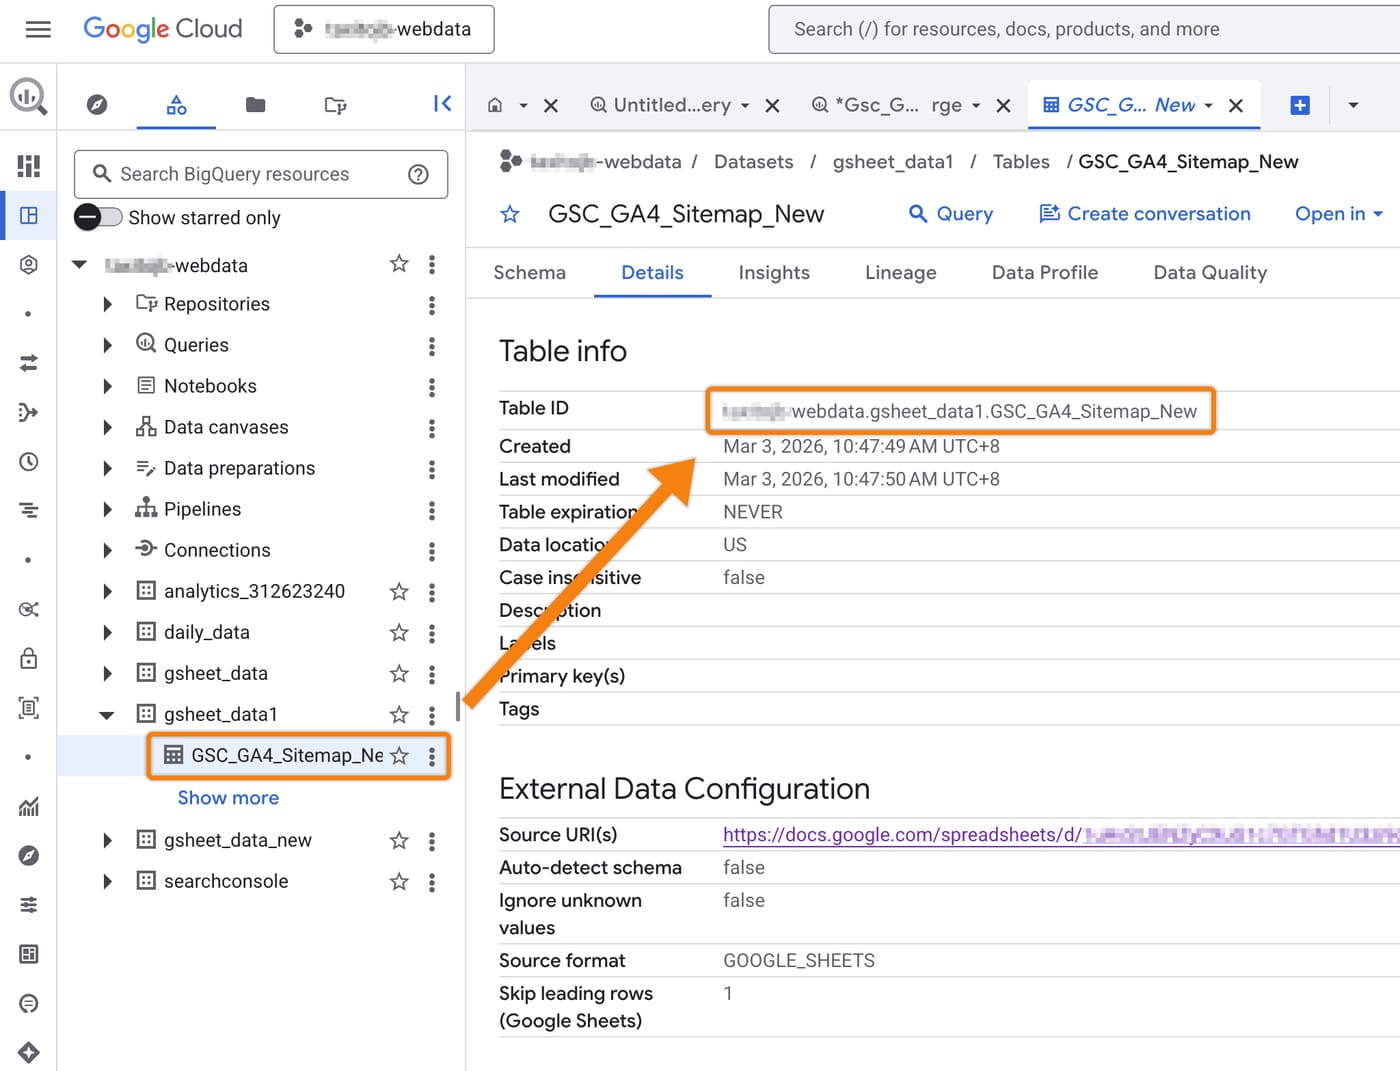
gsheet table id
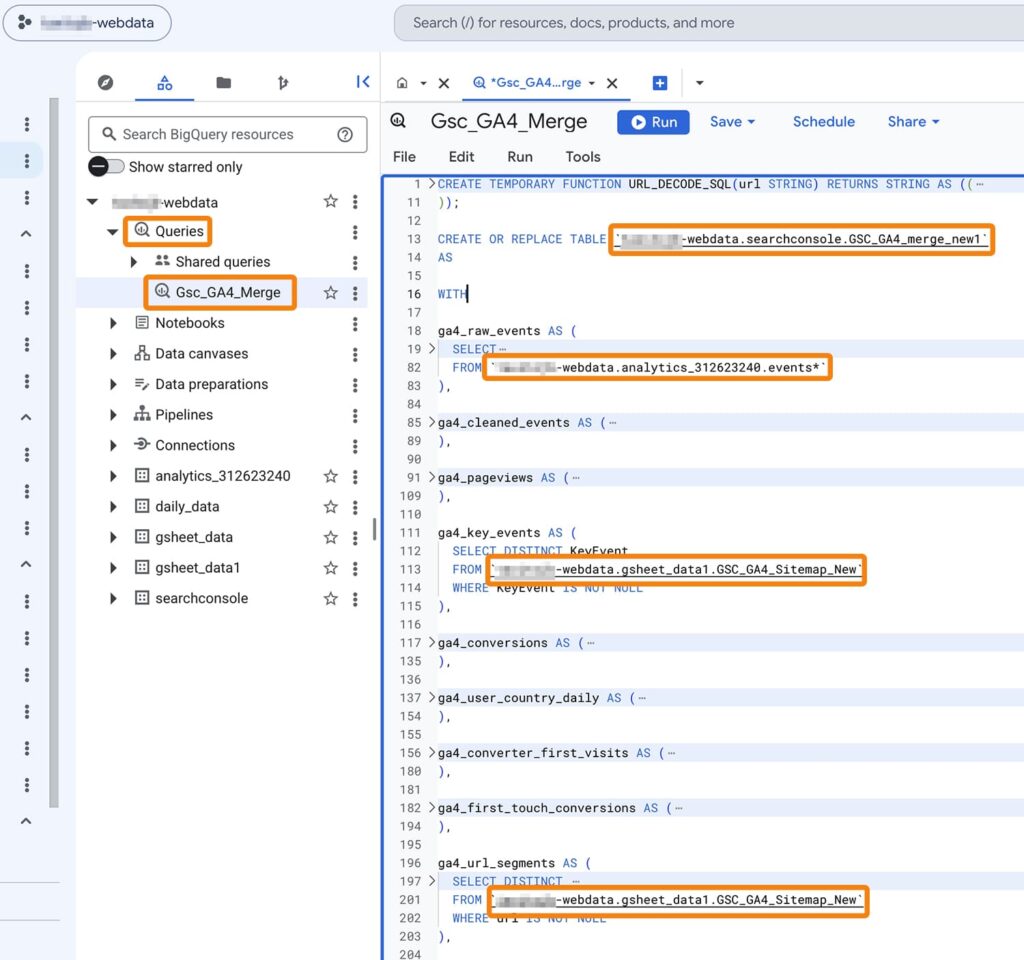
After that, go to Queries > Gsc_GA4_Merge. In the SQL editor, replace the following line of code:
Line 13: Update with your project, dataset, and table name.
- Format: project_id.dataset_name.table_name
- Example: seoie-webdata.searchconsole.GSC_GA4_merge_new1
Line 82: Replace with your GA4 events table ID.
Lines 113, 201, and 277: Replace with your Google Sheet table ID.
Line 295: Replace with your GSC searchdata_url_impression table ID.
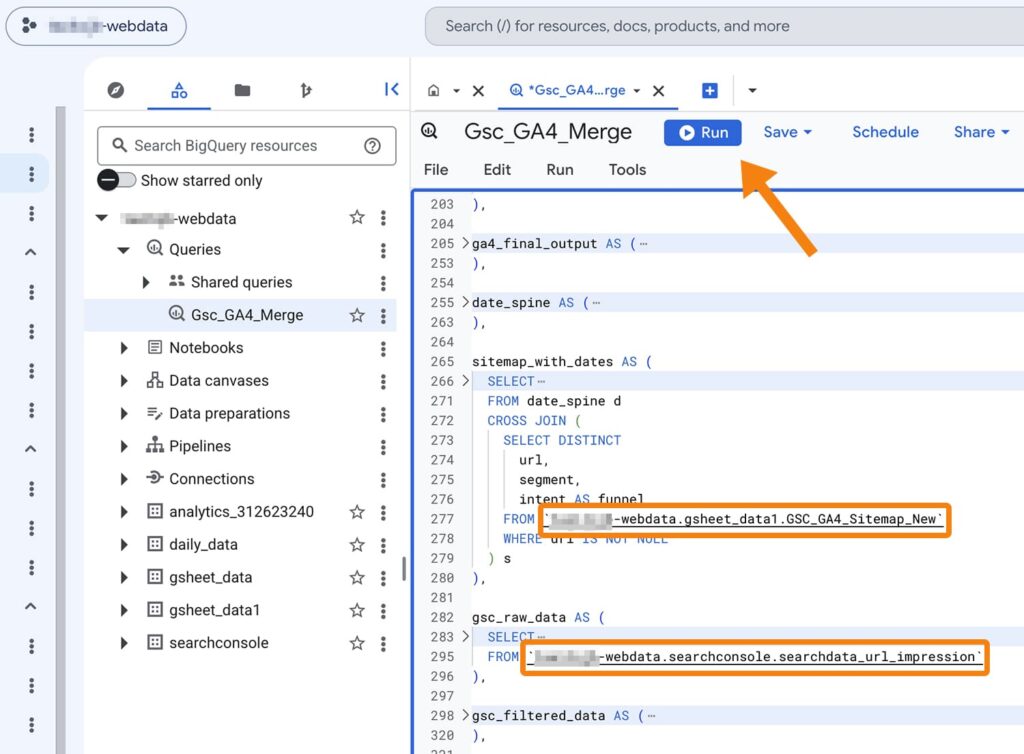
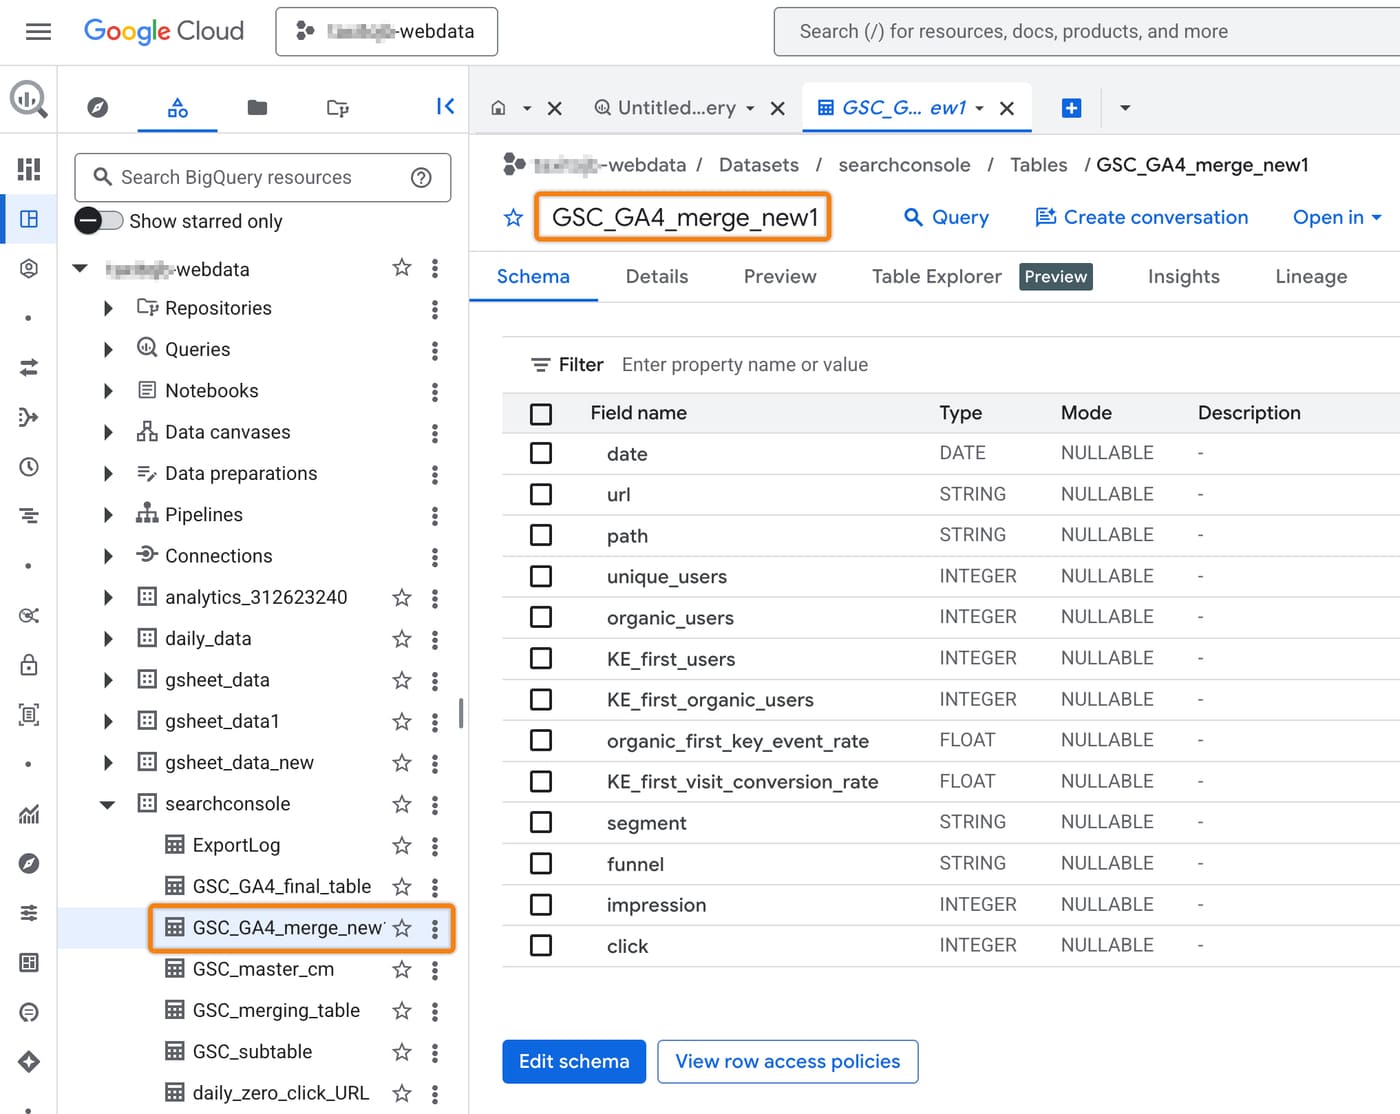
Click ‘Run’ after updating the code. If successful, the GSC_GA4_merge_new1 table will be generated under the searchconsole dataset, as shown below:

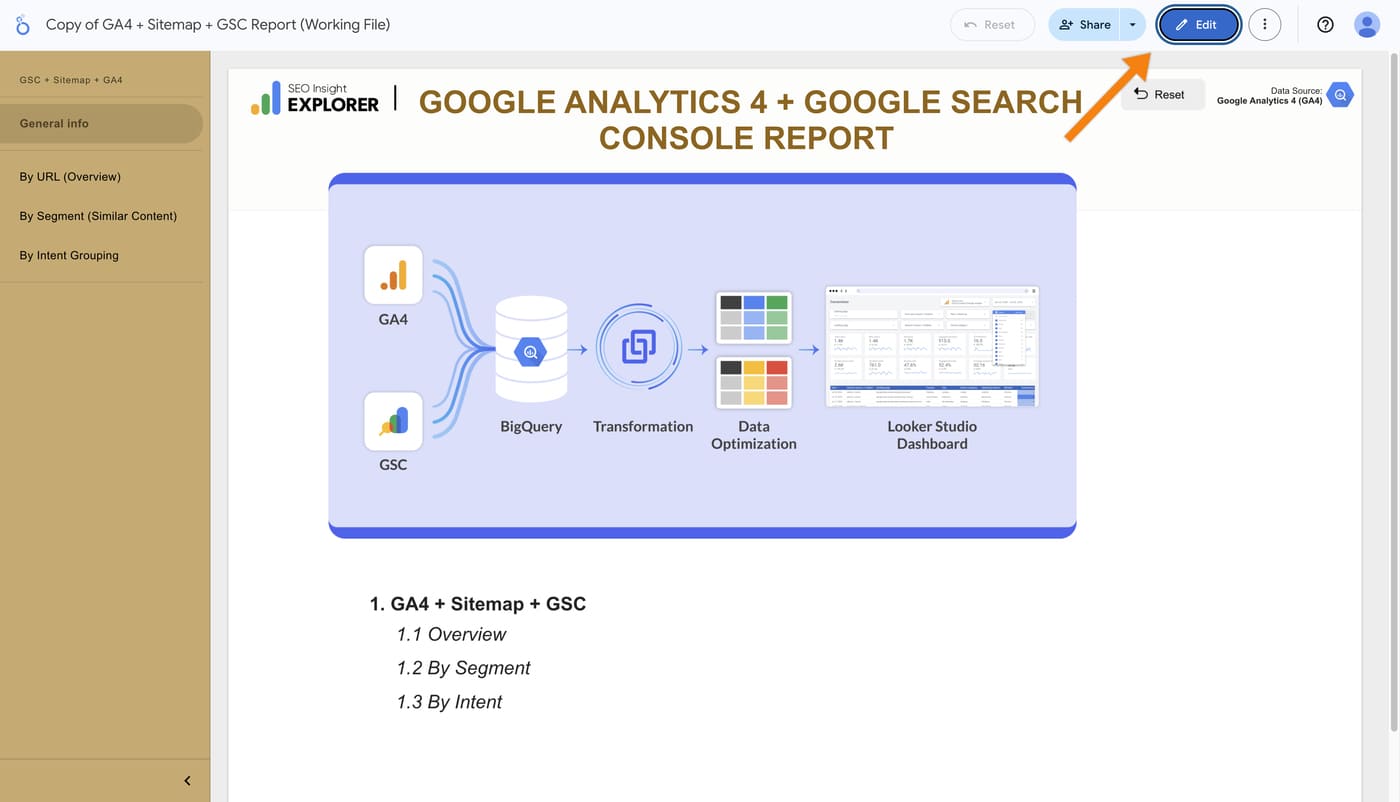
Click the link below:
https://datastudio.google.com/u/0/reporting/d66f23fa-3bf3-4ff9-bc9d-114b561e7717/page/p_oawf54rs0d
Then click the ‘three-dot menu’ and select ‘Make a copy’ as shown in the image below:
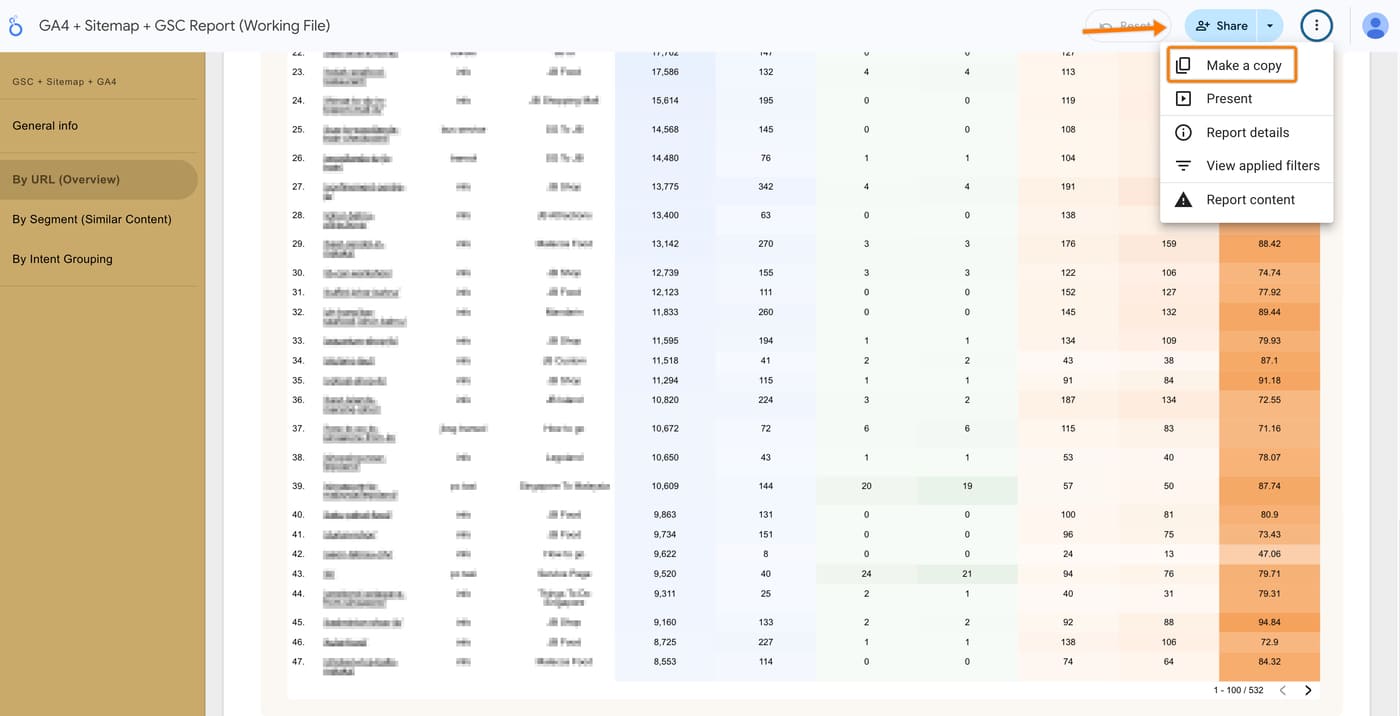
Next, go to ‘New Data Source’ > ‘Create data source’.
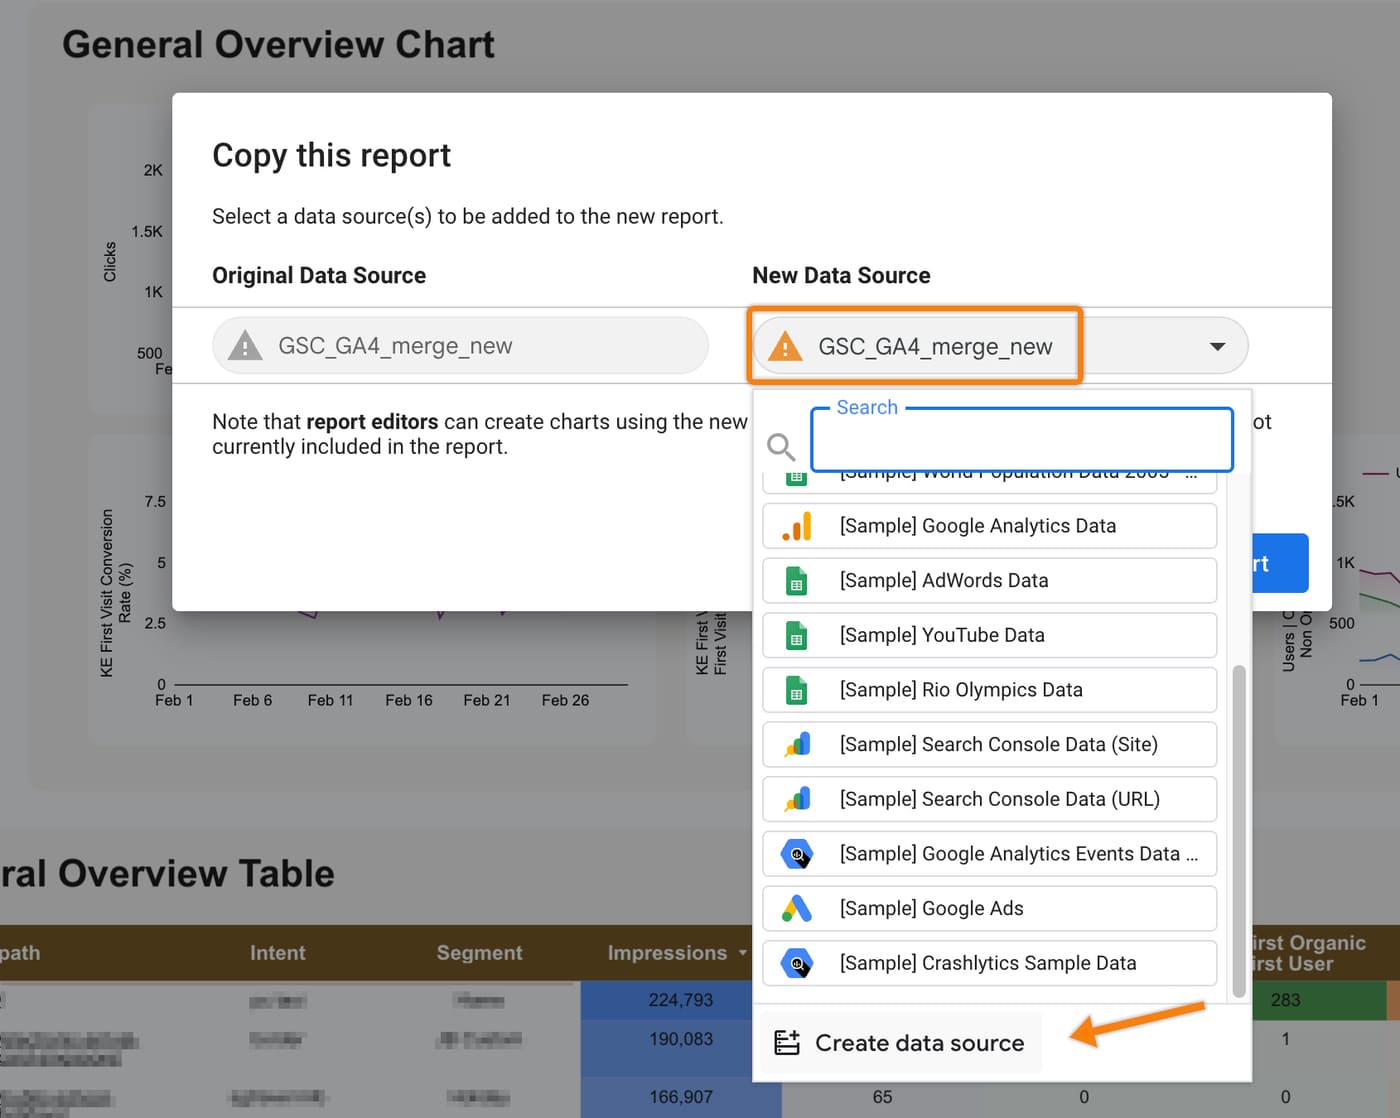
After that, choose ‘BigQuery’.

Next, select ‘My Project’ > ‘Project’ (seoie-webdata) > ‘Dataset’ (seachconsole) > ‘Table’ (GSC_GA4_merge_new1), then click ‘Connect’.

Click ‘Add to Report’ (top right).

Click ‘Copy Report’ to complete the setup.

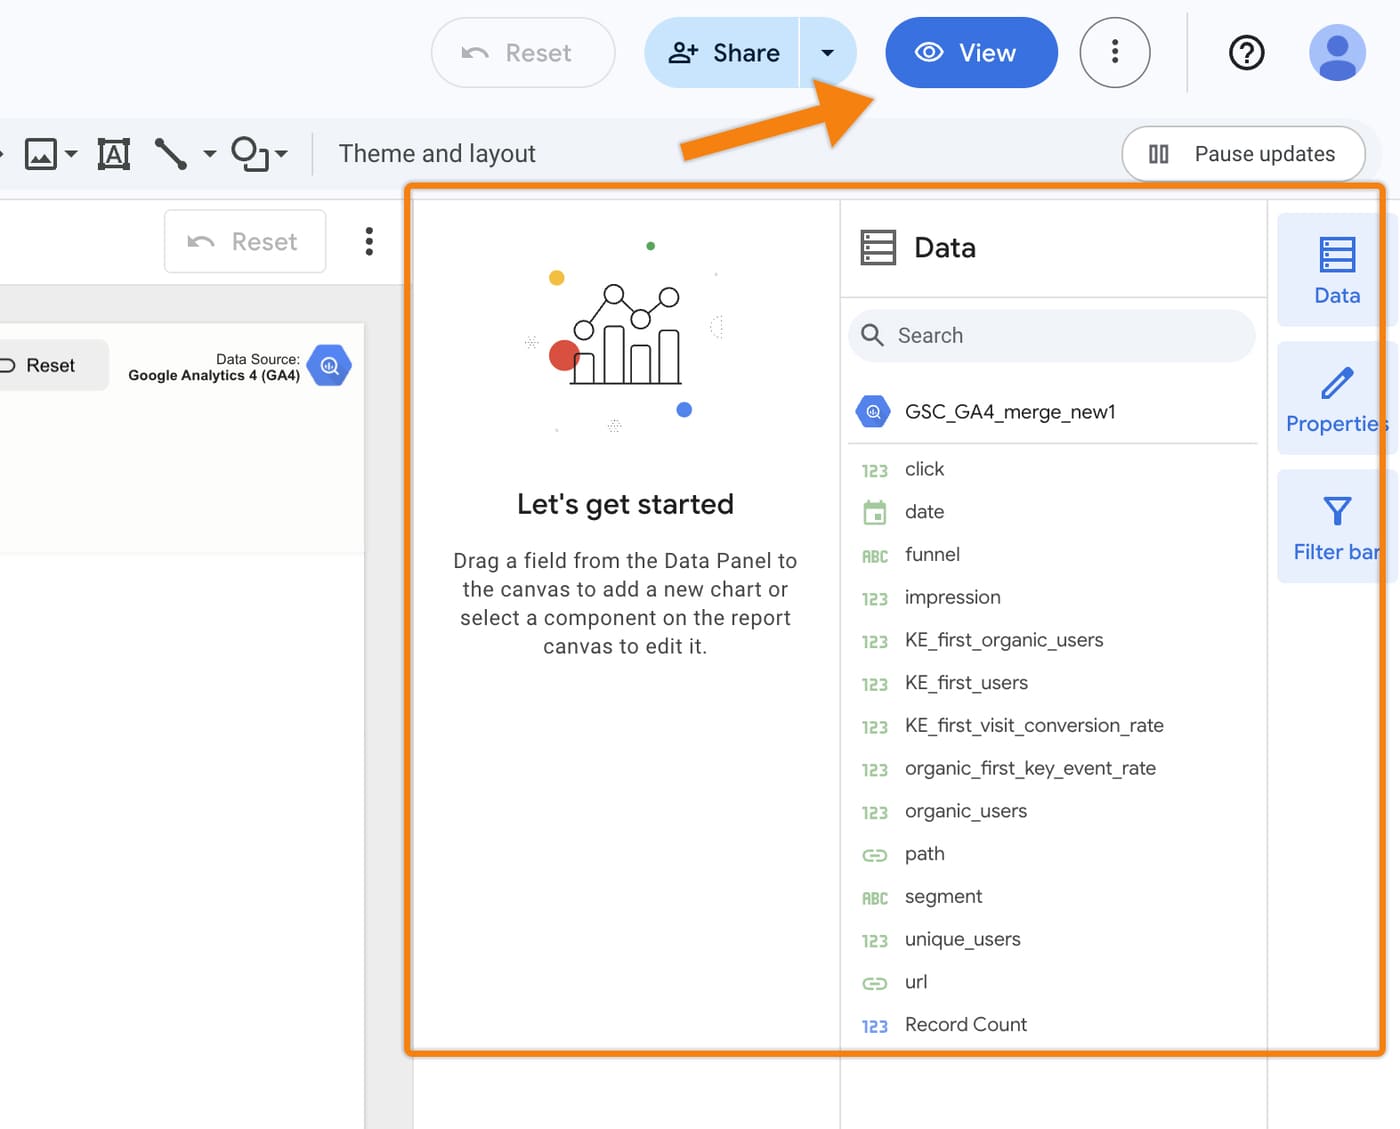
Click ‘View’ (top right) to hide the side panels on the right.
Click ‘Edit’ (top right) to change the looker report name.
Click ‘View’ (top right) again after changing the name.

Refresh your Looker report and be sure to copy the URL. This will allow you to access your report easily in the future.
Note: Can’t find the Looker Report URL? You can access your report here: https://datastudio.google.com/. (Make sure to use the same email address you used when you originally created the one-page report.)
FYI: Looker report data is loaded from here (GSC_GA4_merge_new1).
This is the final step required to run the process daily on BigQuery. Looker Studio will then automatically update the data, so your looker will update daily basis.
Below are the steps to schedule a query in Google BigQuery.
First, go to Queries > Gsc_GA4_Merge.

Click the ‘Schedule’ and a window will pop up, key in the details as below and then click ‘Save’.
- Name for scheduled query: *input your query name* (for example: daily_gscga4)
- Repeated frequency: choose Days
- At: *choose your timezone* (for example: 00:00)

You will see that the daily schedule is now complete (as shown in the image below).

Info: Once the scheduled query is set, your GSC and GA4 data will refresh daily to ensure Looker Studio displays the latest reports.
We suggest running the scheduled query only once per day, as both GSC and GA4 typically update their data on a daily cycle.
Running the query multiple times is unnecessary and avoids wasting money, as transforming data consumes resources and increases costs if your data is large.