First, click this link: https://console.cloud.google.com to sign in to Google Cloud Console. Accept Terms of Service and continue.

Step 2: Create Project
Click ‘Select a project’ (top left) and click ‘New Project’.

Key in the details below:
- Enter your Project name (for example: seoie-webdata);
Note: The Project ID is automatically generated based on the Project Name. You may edit it if you prefer a different Project ID, but we typically recommend leaving it as the default.

And then click Create. Project named seoie-webdata will be created.
Note: Remember to create a separate project for each website to keep your data organized and avoid exporting multiple sites into the same project.
Step 3: Linked Your Project To A Billing Account
Important: It is a very important step to link your project to an active billing account to avoid data loss once the 90-day free trial expires.
First, you need to select the project (top left), and then click ‘Link a billing account’.

After that, click ‘Create billing account’.

Select the Country and click ‘Agree & continue’.
Note: The country you select must match the issuing country of your credit card or payment method. Google’s billing system verifies the “Bank Identification Number” (BIN) of your card. If you select Malaysia but try to use a card issued in the UK, the transaction will likely be declined.

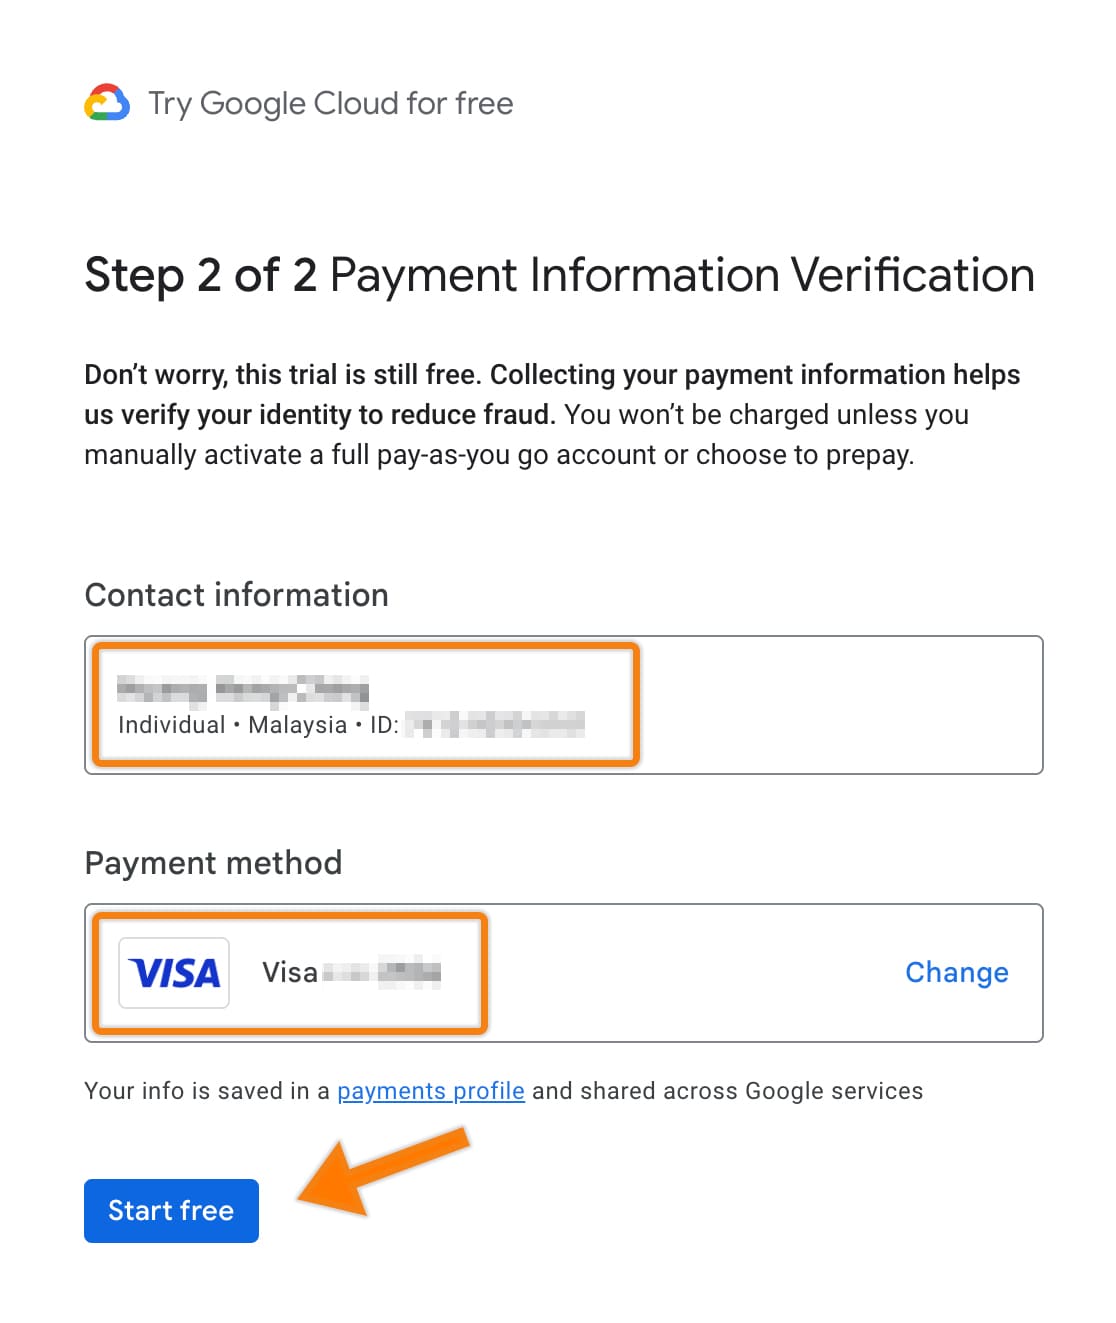
Enter your Contact Information, Payment method and then click ‘Start free’.

Add credit or debit card details and click ‘Save card’.

After that, click ‘Start free’.
Your billing account has been successfully linked to your project.
Important note: The Google Cloud free trial lasts for 90 days or until you have used $300 USD in credits, whichever comes first.
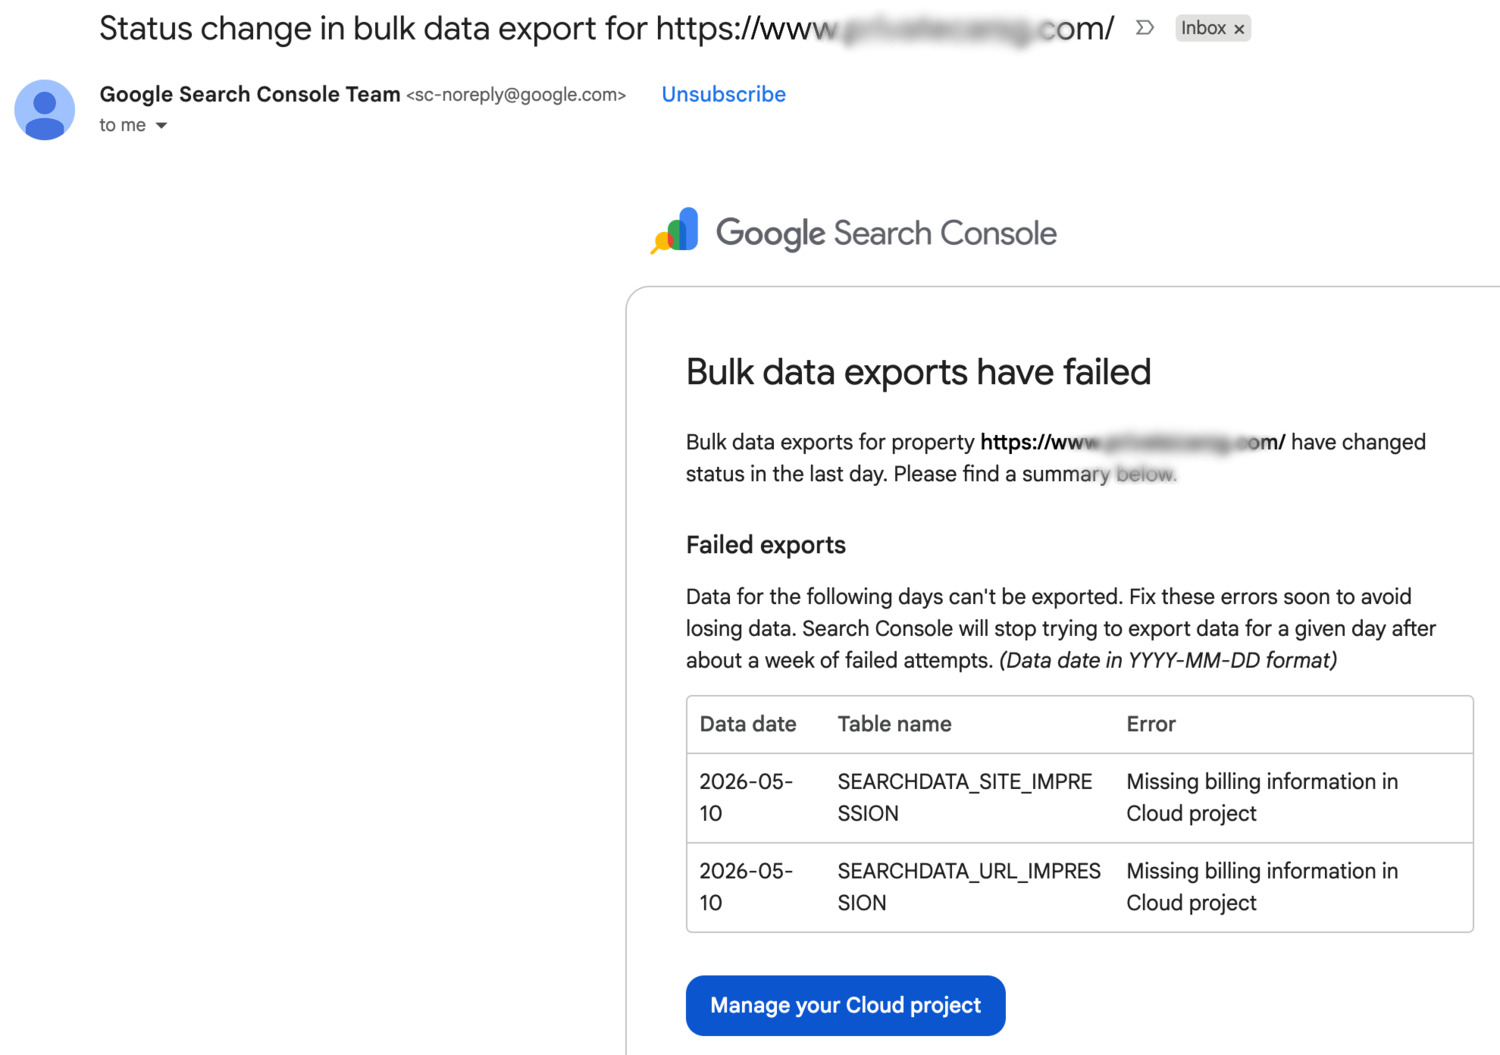
After that, you will be informed by email, as shown in the image below:
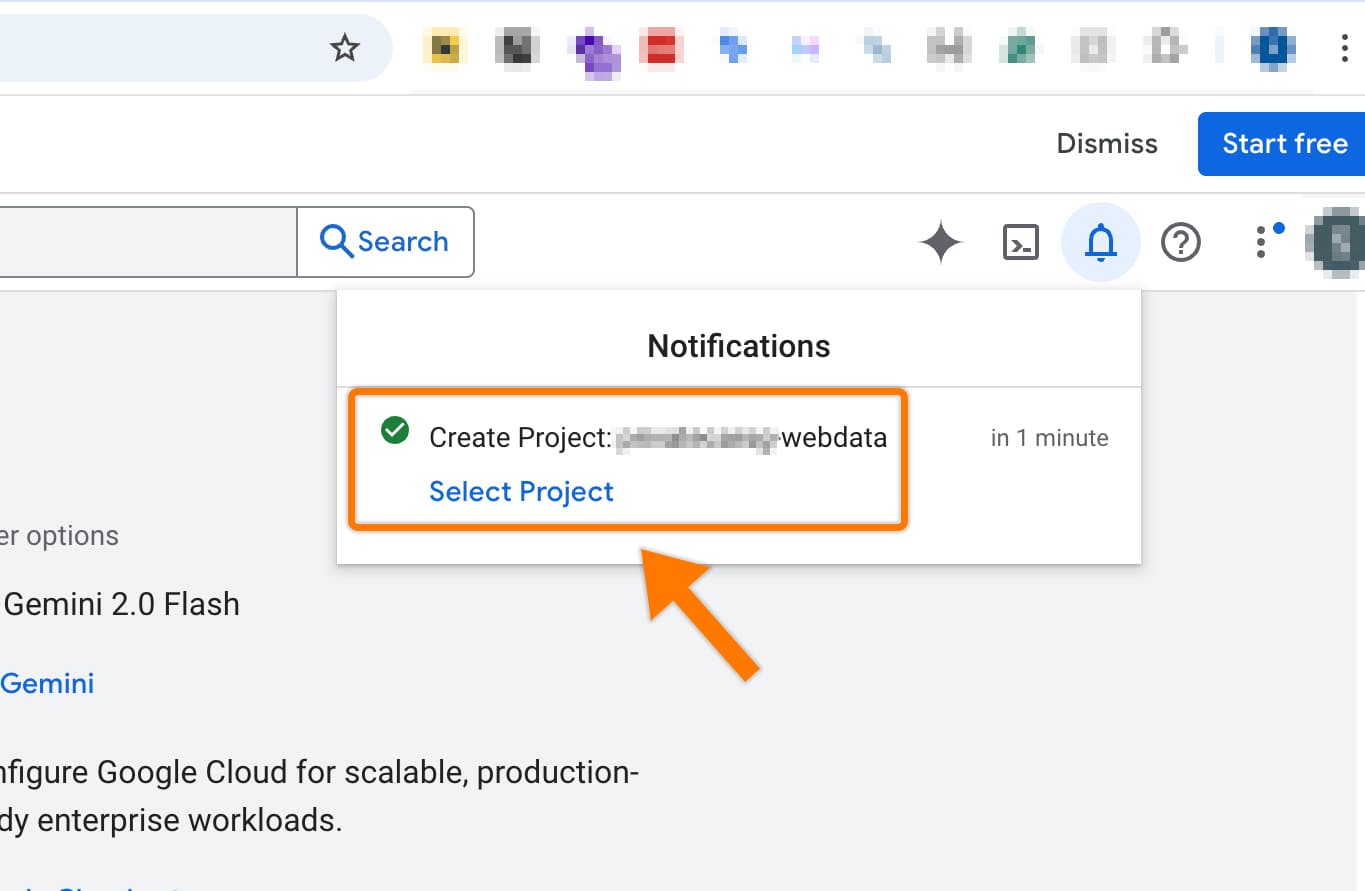
Alternatively, you will see a notification in the top bar of the Google Cloud dashboard:

You must click Upgrade. This is a crucial step to prevent any data export failures in the following days.
After clicking ‘Upgrade’, a pop-up message saying “Activate your full account” will appear and then click ‘Activate’ as shown in the image below.

Another pop-up message will then show “Your full account was activated successfully!”. Click ‘Continue’ and you are done.

Step 4: Enable API
In the top search bar, search for ‘BigQuery API’ as shown in the image below, and click ‘BigQuery API’ from the dropdown list.

On the following page, ensure the status shows ‘API Enabled’, as shown in image below.

Step 5: Connect Google Search Console (GSC)
Google Cloud Project Console
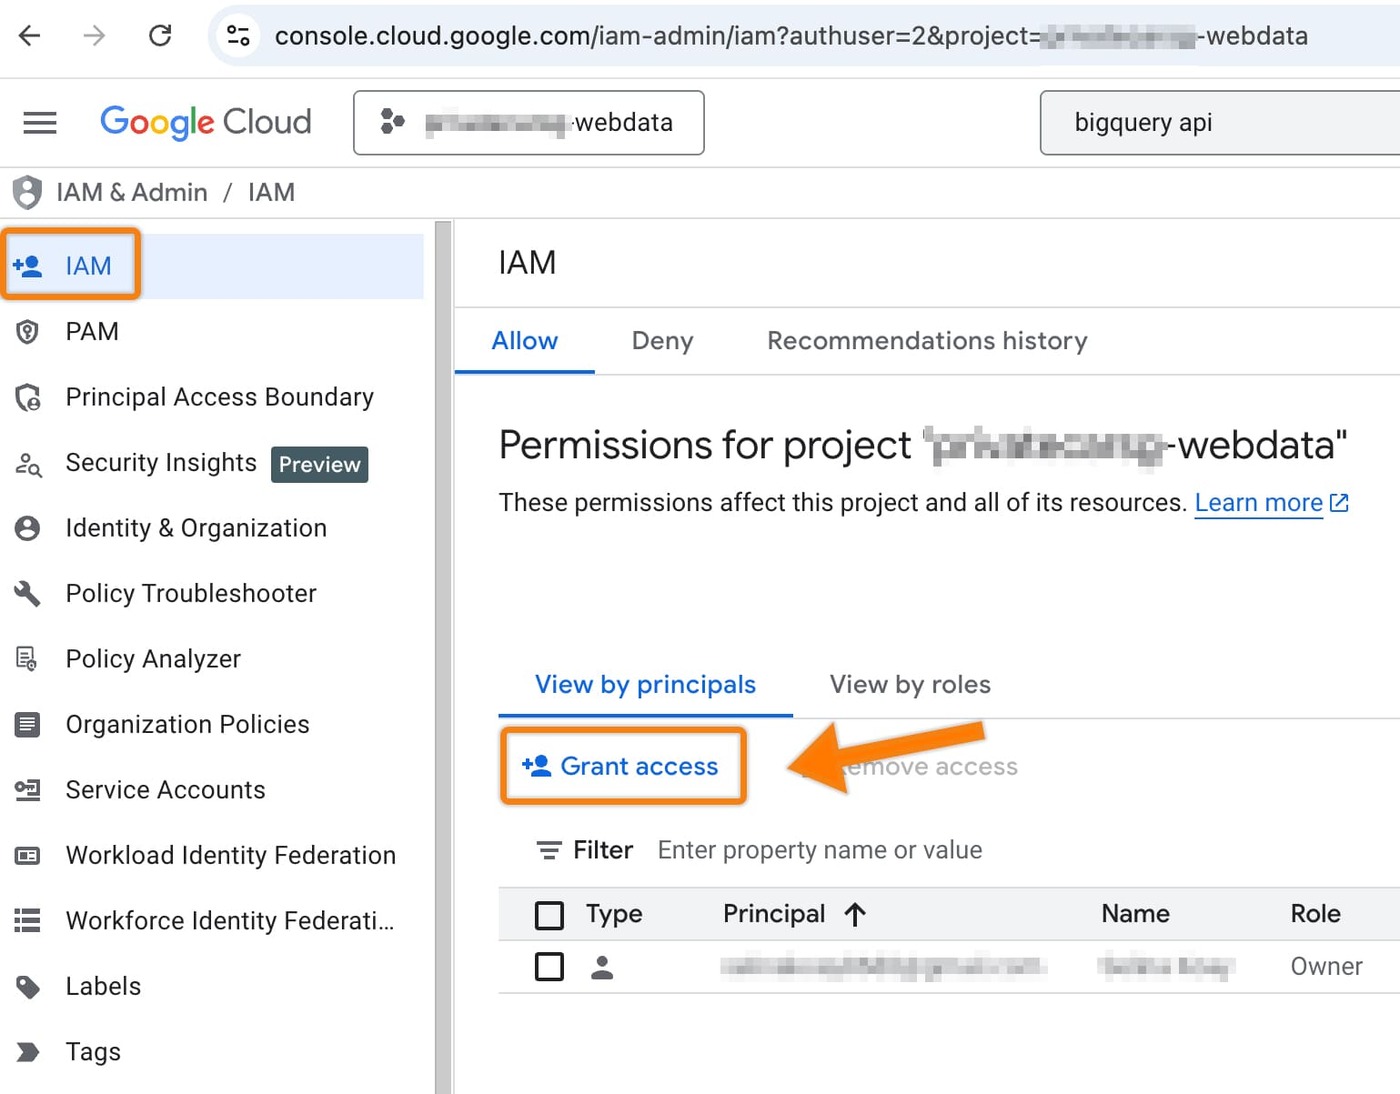
First, click your project in the top left. A window will pop up, choose your project. Next, click the hamburger icon to open the side menu and select IAM & Admin > IAM.

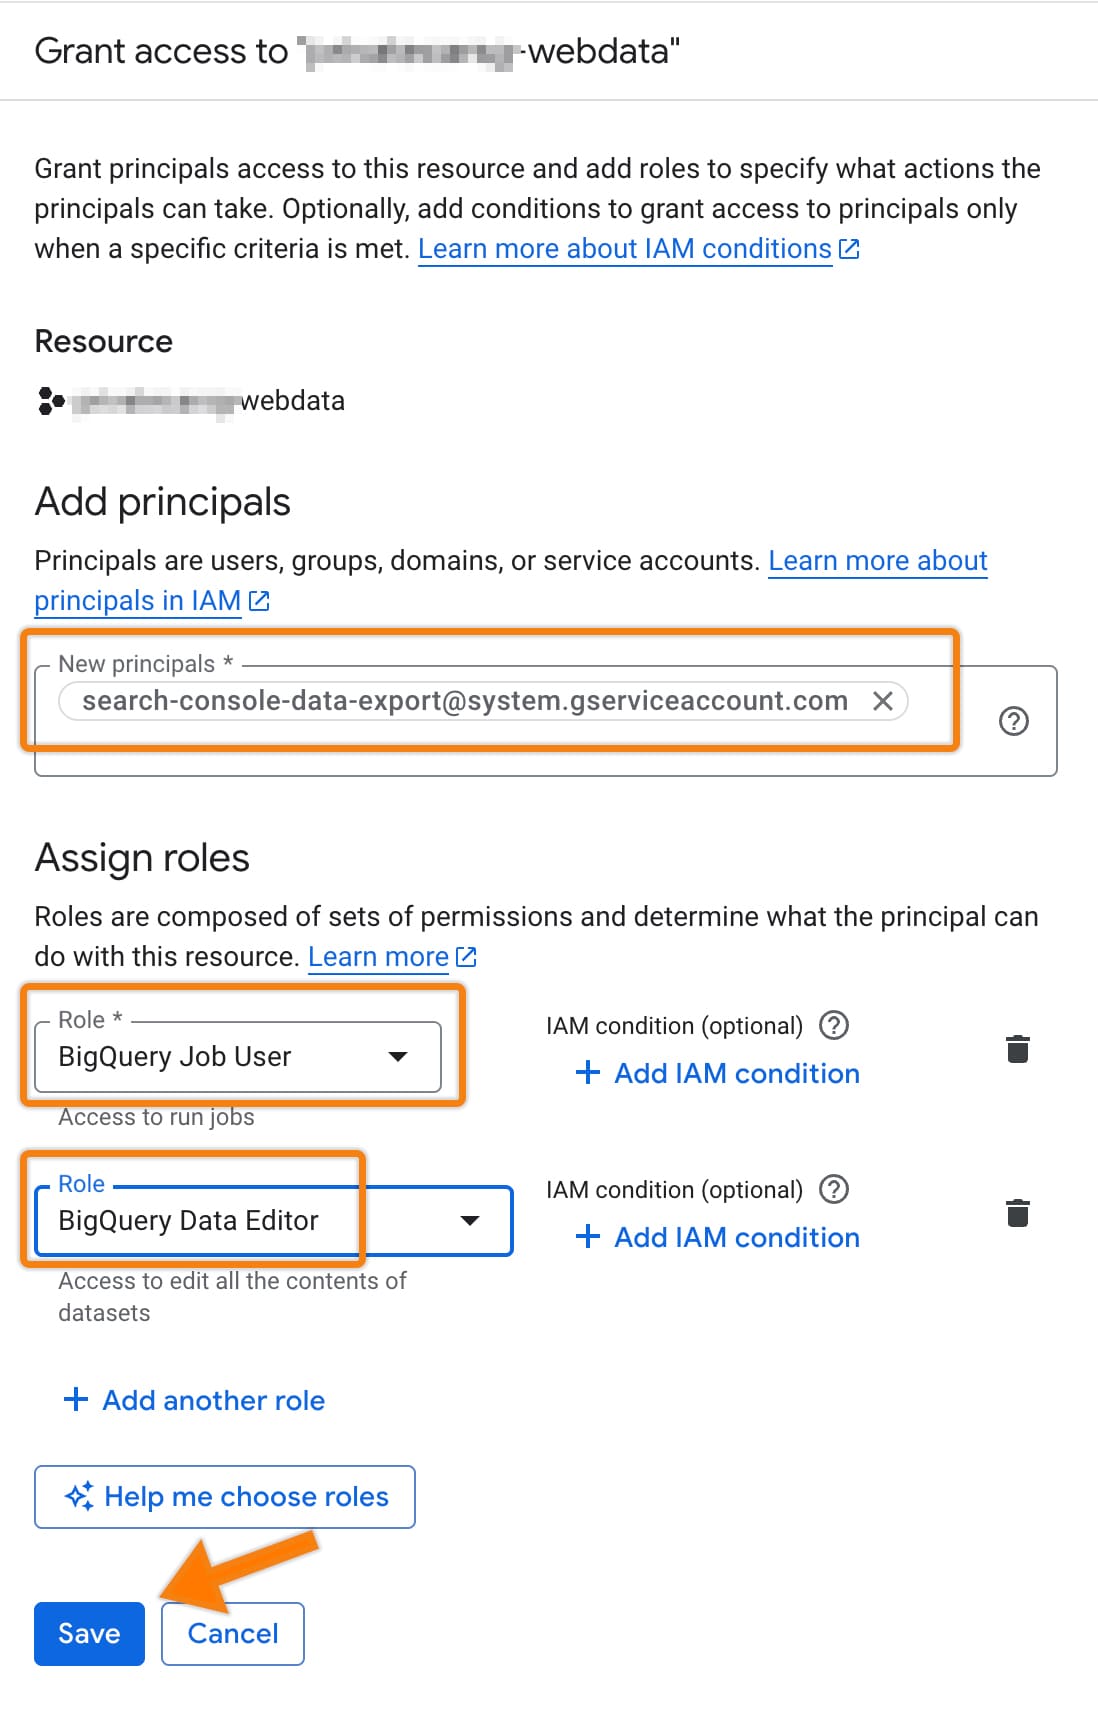
After that, click ‘Grant access’.
A window will pop up on the right. Add search-console-data-export@system.gserviceaccount.com to the ‘New principals’ section.
In the ‘Role’ section, search for: BigQuery Job User and select it and click another role and search for BigQuery Data Editor and select it. Finally, click ‘Save’.
Google Search Console
Go to https://search.google.com/search-console/ and select your domain > Click Settings > Click Bulk Data Export.
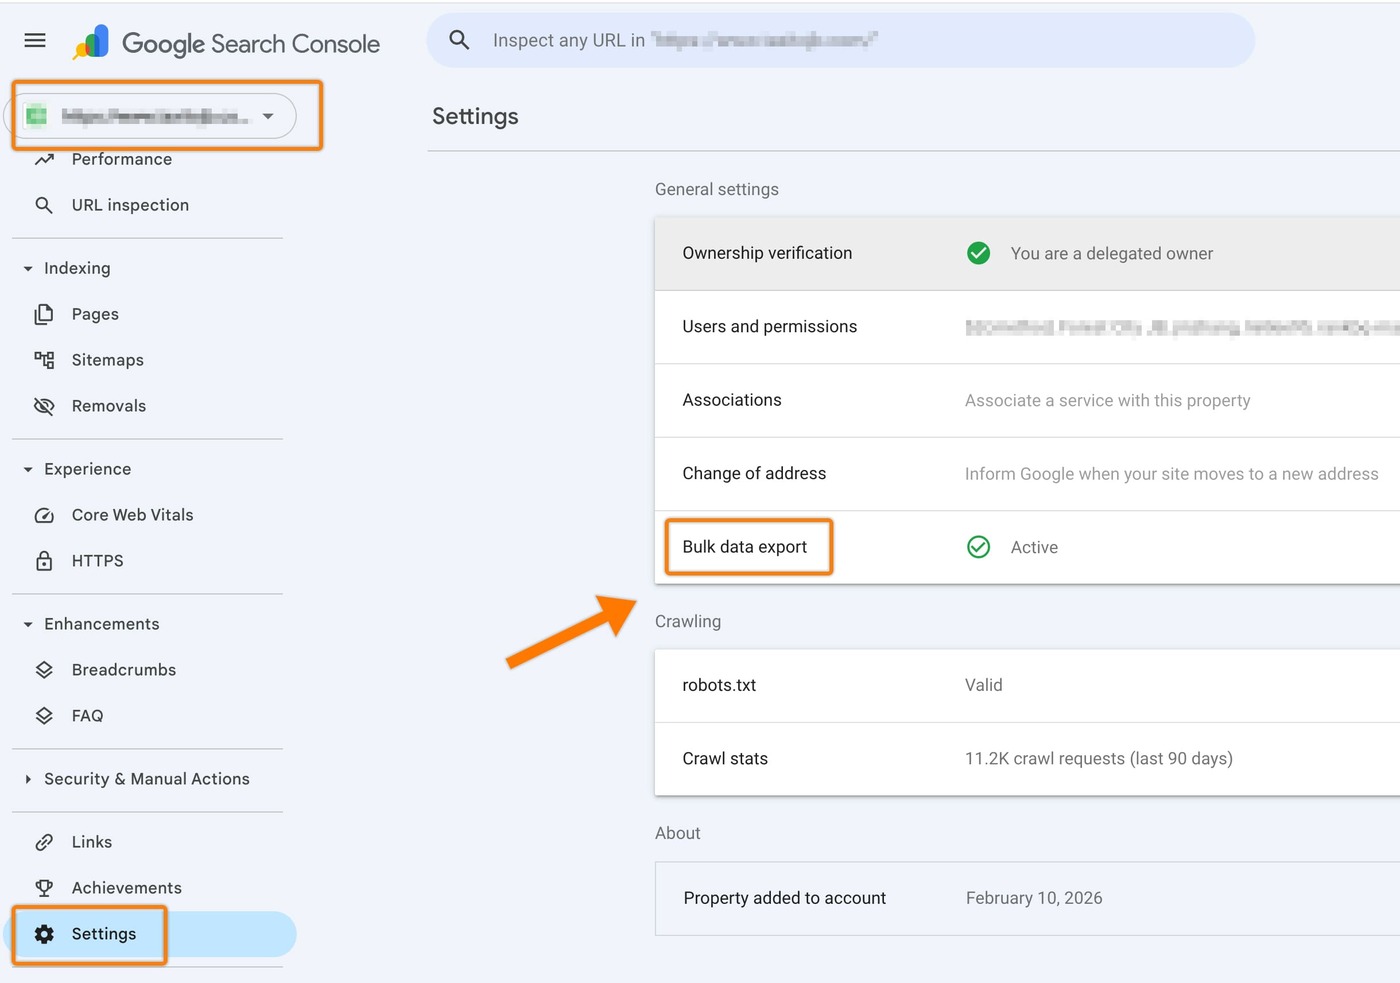
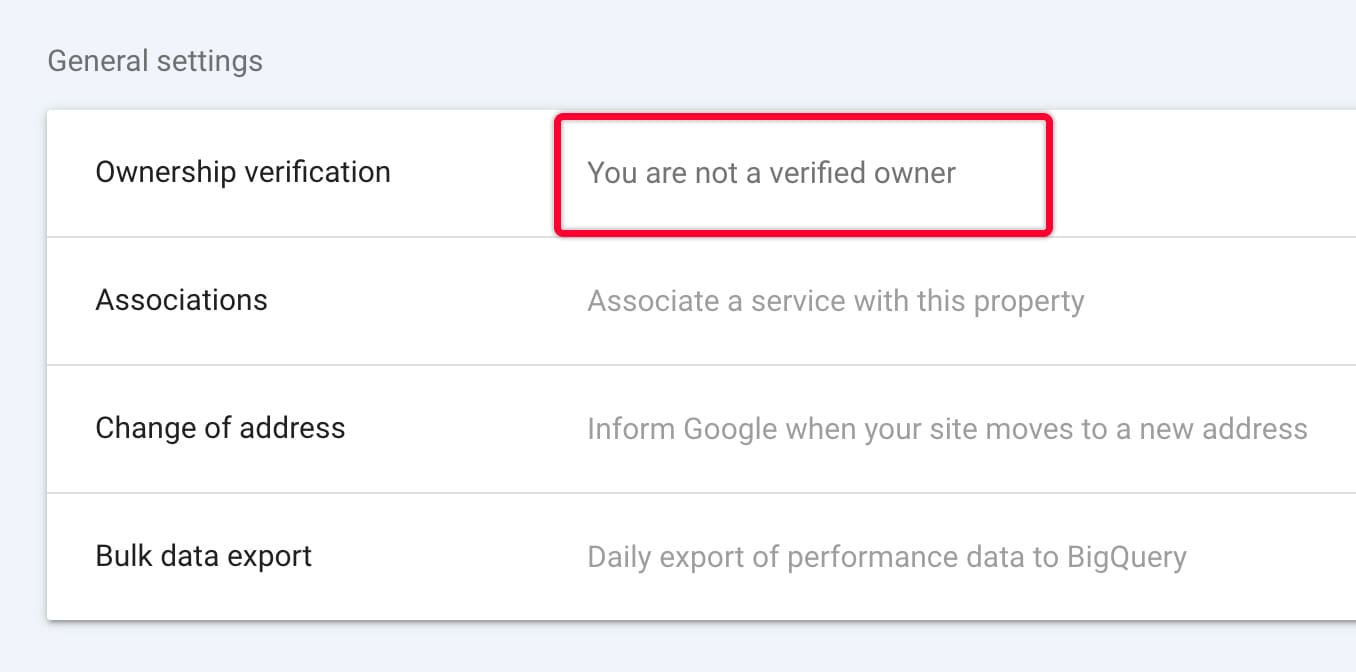
Note: Make sure you are a delegated owner before proceeding with this step.
Otherwise, you will see ‘You are not a verified owner’ as shown in image below:
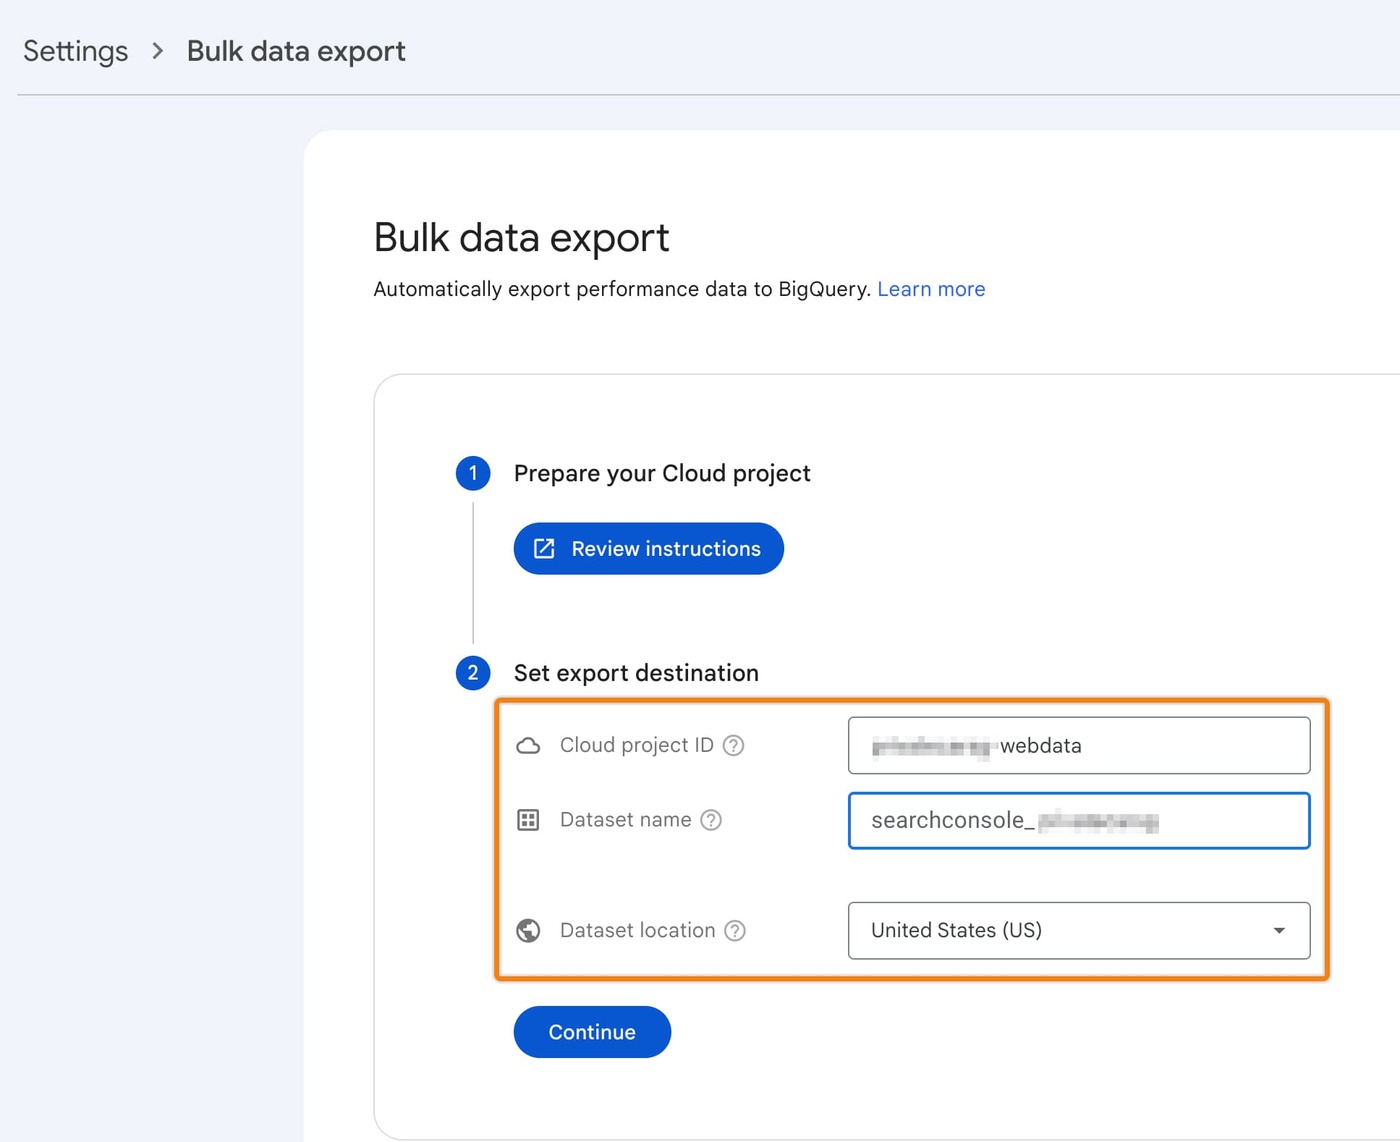
Enter the details as below:
- Cloud project ID: *your Project ID* (make sure your Project ID is same as your Google Cloud Project Console)

- Dataset name: *searchconsole* (left it default)
- Dataset location: *choose your dataset location* (set location to US)
And then, click ‘Continue’.
Click ‘Set up report’.

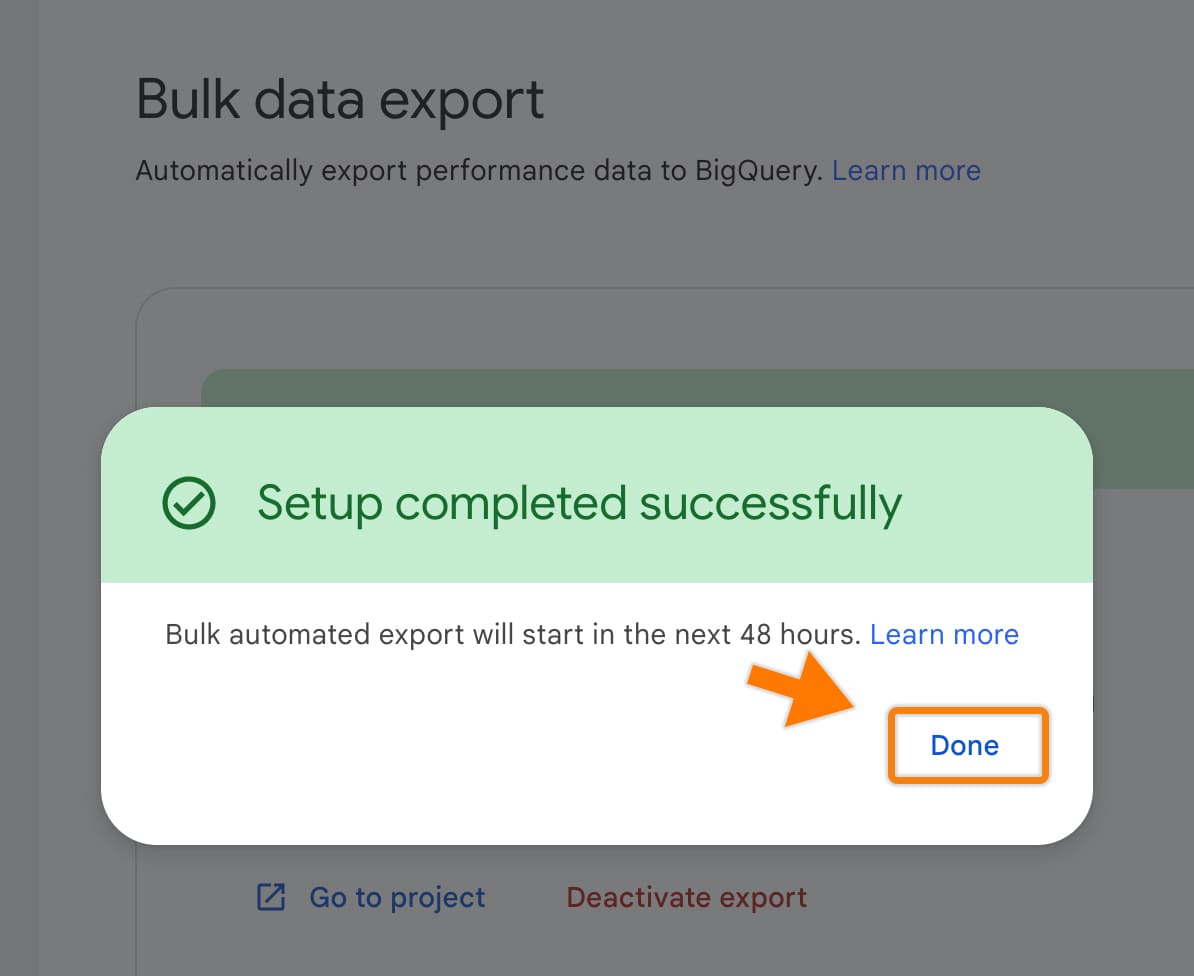
A message ‘Setup completed successfully’ will be displayed and click ‘Done’.
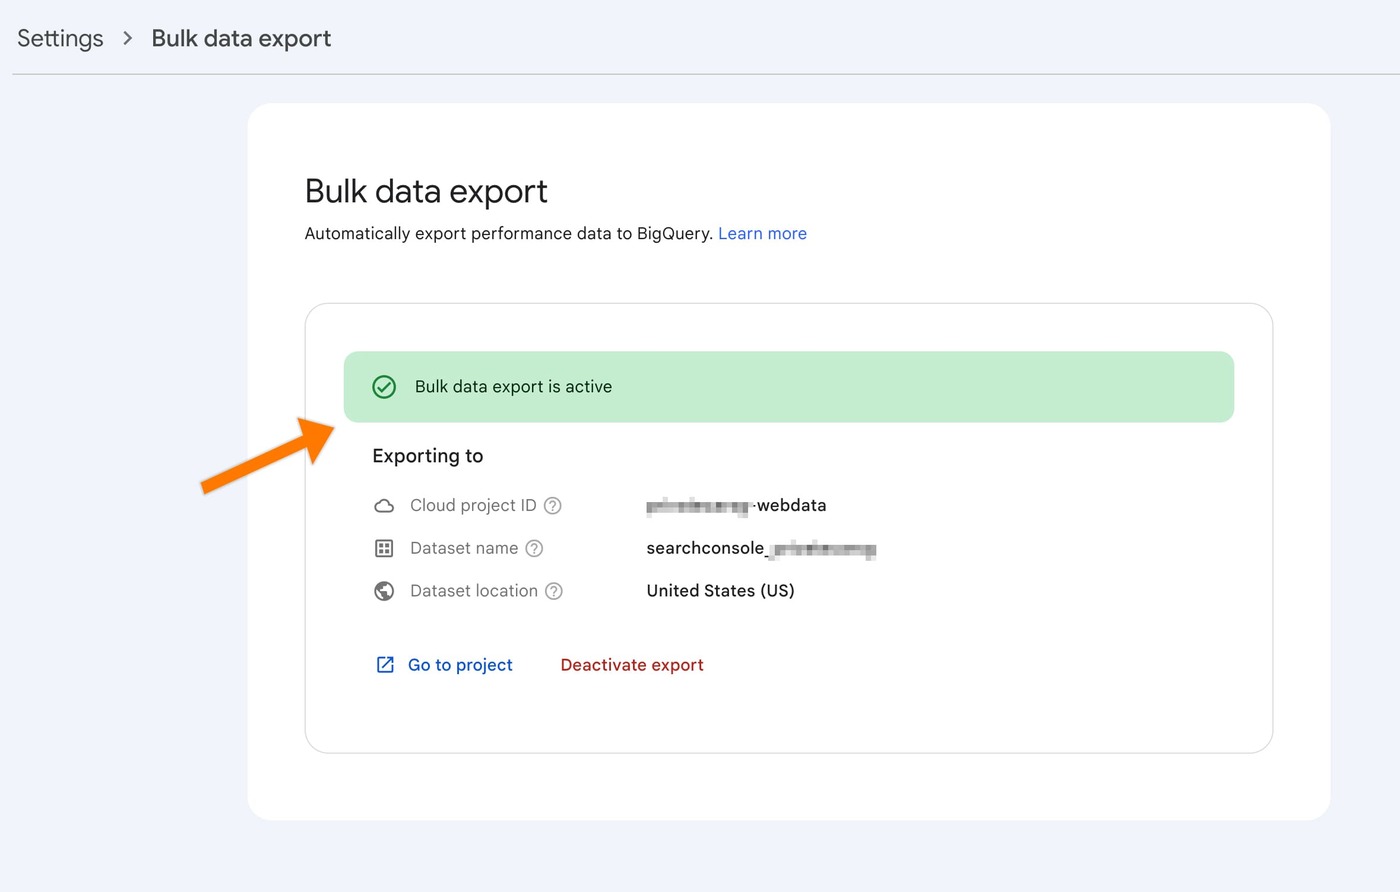
Following page is shown: ‘Bulk data export is active’.
FYI: Sometimes the bulk data export may fail due to Google technical issues. But don’t worry—it will resume in a couple of days.

Step 6: Connect Google Analytics 4 (GA4)
Go to https://analytics.google.com/ and select your domain > Admin > Product Links > BigQuery Links.
Note: Make sure you have a higher level of access: Administrator roles in GA4 before proceeding this step.

Click ‘Link’.

Click the blue text that says ‘Choose a BigQuery project’.

Select project and click ‘Confirm’ (top right).

And then, set Data Location to United States (US) and click ‘Next’.

In Event Data section > select Daily only Under “Export types” (This stays within the free 1-million-event daily limit) > click ‘Next’.

And finally click ‘Submit’.

You will see the link created in GA4, as shown in the image below.

Step 7: GSC & GA4 Data Export Check
After connecting your Google Search Console (GSC) and Google Analytics 4 (GA4) to BigQuery, it may take up to 48 hours for the first set of data tables to appear.
You can verify the data as described below.
For the GSC data export to BigQuery, the dataset and tables will appear as shown in this image:

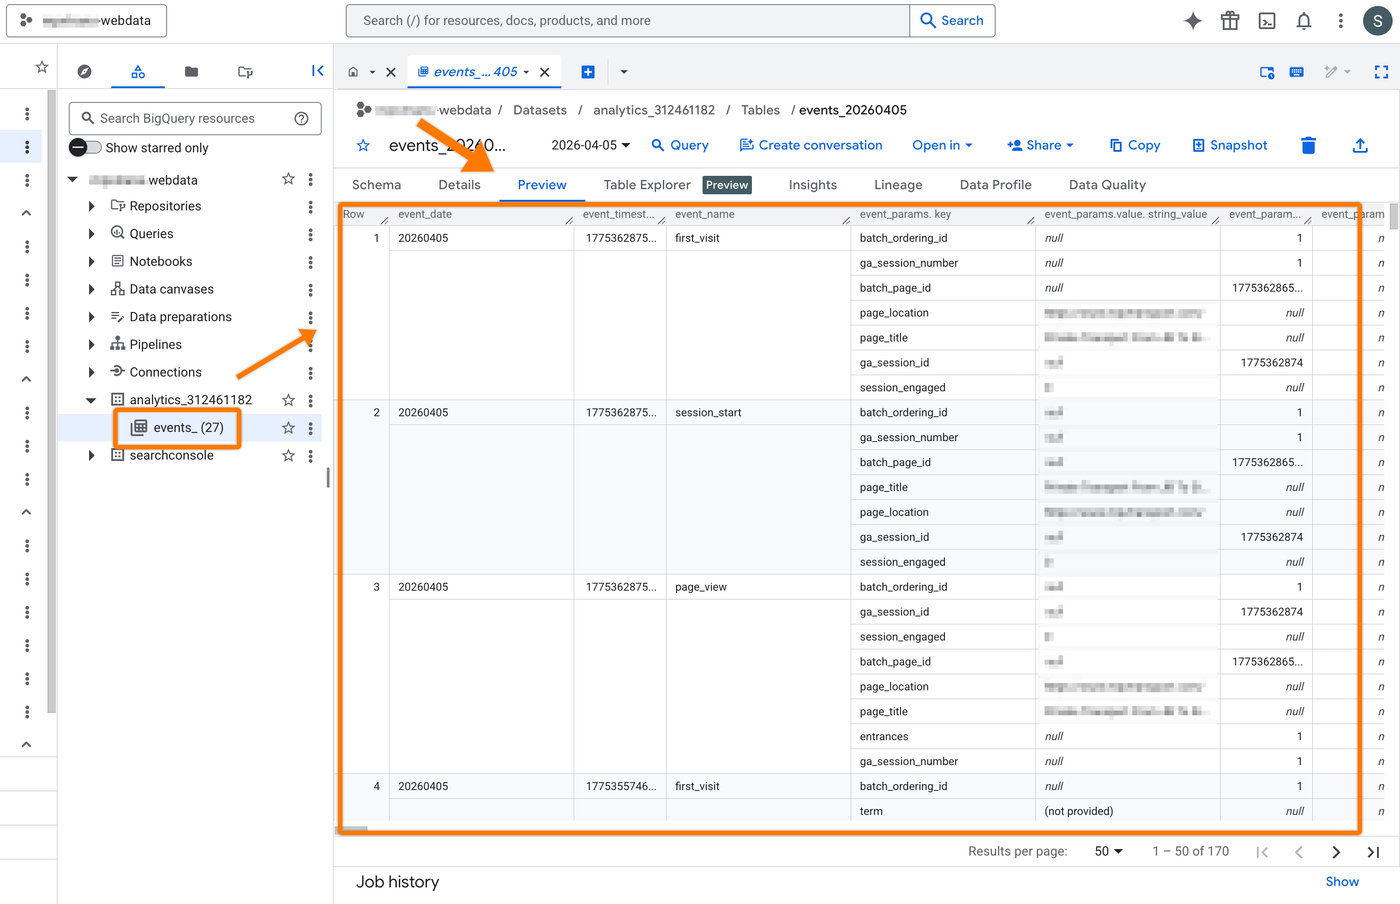
For the GA4 data export to BigQuery, the structure will look like the image below:
Last but not least, in the ‘Details’ tab, verify that the Table expiration is set to ‘NEVER’ to ensure your data is stored permanently.
Why is this important? By default, Google Cloud BigQuery sandbox accounts or certain dataset settings may have a 60-day expiration. If it says anything other than NEVER, your data will be automatically deleted after that period. Checking this ensures your website’s historical data remains safe.

GA4

GSC